
Create Kubernetes cluster
Overview
This documentation provides step-by-step instructions on how to create a Kubernetes cluster using our service. By following these steps, you can set up and configure a Kubernetes cluster to host your applications.
Information on the page
The "Create Kubernetes Cluster" page is where you can initiate the process of creating a new Kubernetes cluster. Here's what you can see and do on this page:
Cluster Deployment Location
This is typically the geographical region where most of your clients are located. Currently, the "Europe" and "N. America" regions is available for deployment.
Cluster Name
Provide a unique name for your Kubernetes cluster. This name will help you identify and manage your clusters easily.
Domain Name
Specify a domain name for your application. This domain name will be bound to your Kubernetes cluster, allowing your clients to access your application. After you create a cluster download the Validation file and place it on your domain provider's DNS server to validate your domain ownership.
Node Configuration
Nodes are the computational resources where your applications will run. You can include nodes in your cluster and carefully configure their location and resources by clicking on the "Add Node" element.
If you need multiple nodes with the same configuration, just specify the number of nodes on the node tile.
You can customize the node's name during addition. Please note that this feature applies solely to new nodes, not existing ones and emma will automatically append a "XXXXXX-" prefix to new node names to guarantee uniqueness, with "X" being a random alphanumeric character [0-9a-z].
Autoscaling groups
Autoscaling dynamically adjusts the number of nodes in your Kubernetes cluster based on the workload demands of your applications. By automatically deploying new nodes or scaling down existing ones, autoscaling ensures optimal performance and resource utilization while minimizing costs.
When cluster workload exceeds available resources, triggering high utilization, a scale up event adds nodes for optimal performance. Conversely, if node unloading is feasible due to underutilization, a scale down event redistributes pods, optimizing resources and reducing costs.
Autoscaling groups can be configured to automatically Scale up and Scale down, considering settings such as:
- Node configurations: a list of preferred configurations for adding new nodes.
- Min-max limits: restrictions on the number of nodes or vCPU in the group.
- Node group price limit: maximum cost threshold for the autoscaling group.
- Use spot instances: prioritizing spot instances when deploying a new node.
Cluster currently supports up to 5 autoscaling groups and a total of 16 worker nodes.
Actions you can perform on the page
To create a new cluster, go to the Kubernetes section in the left menu of the project, then click + Add cluster.
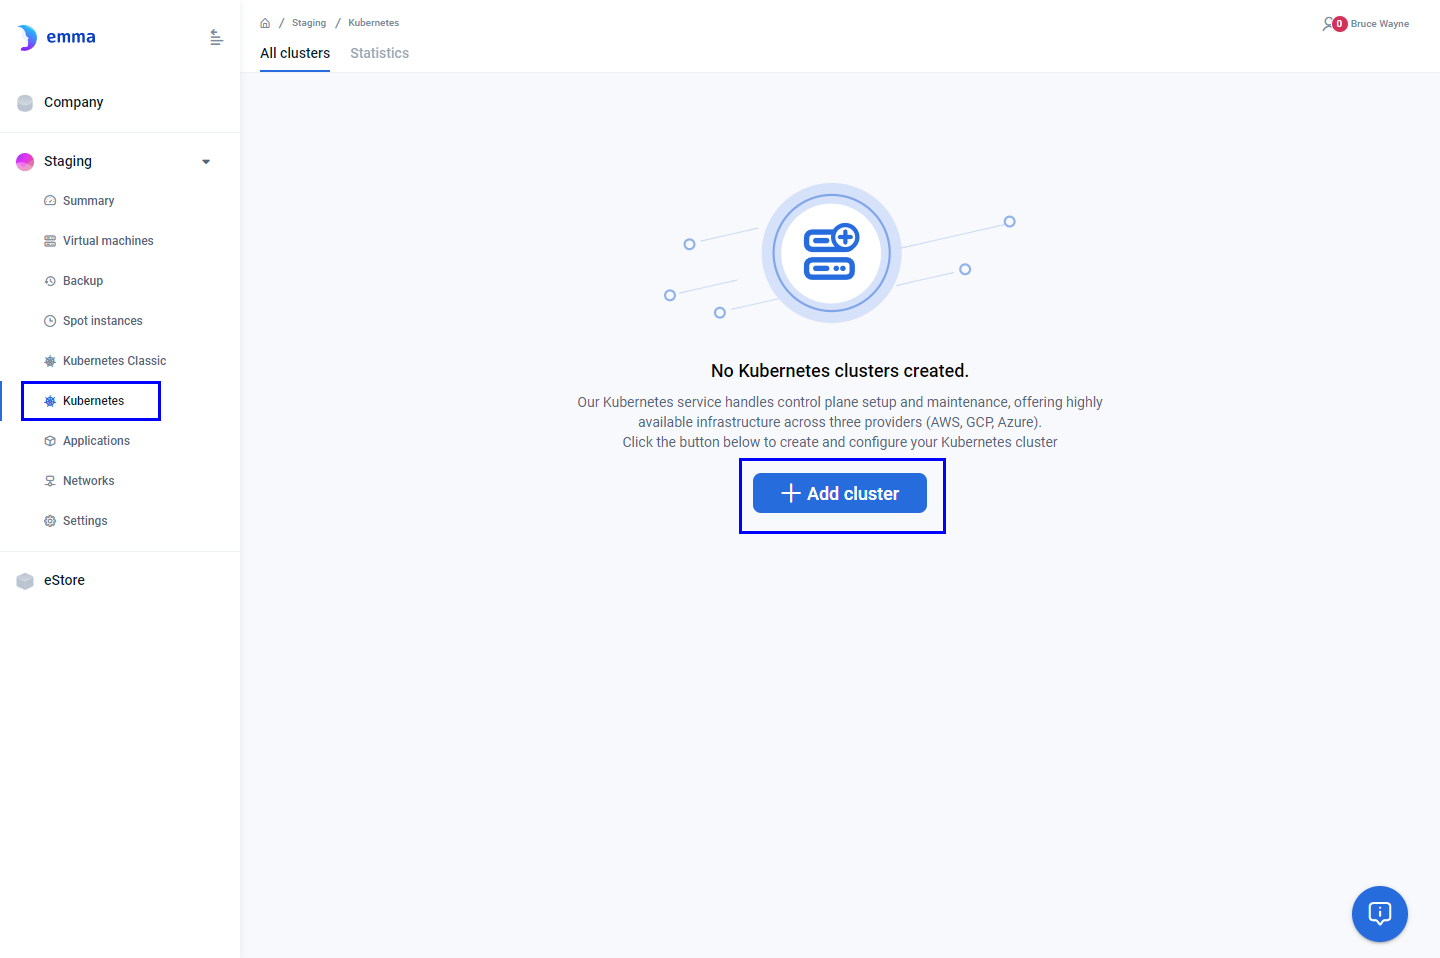
A cluster creation page will open.
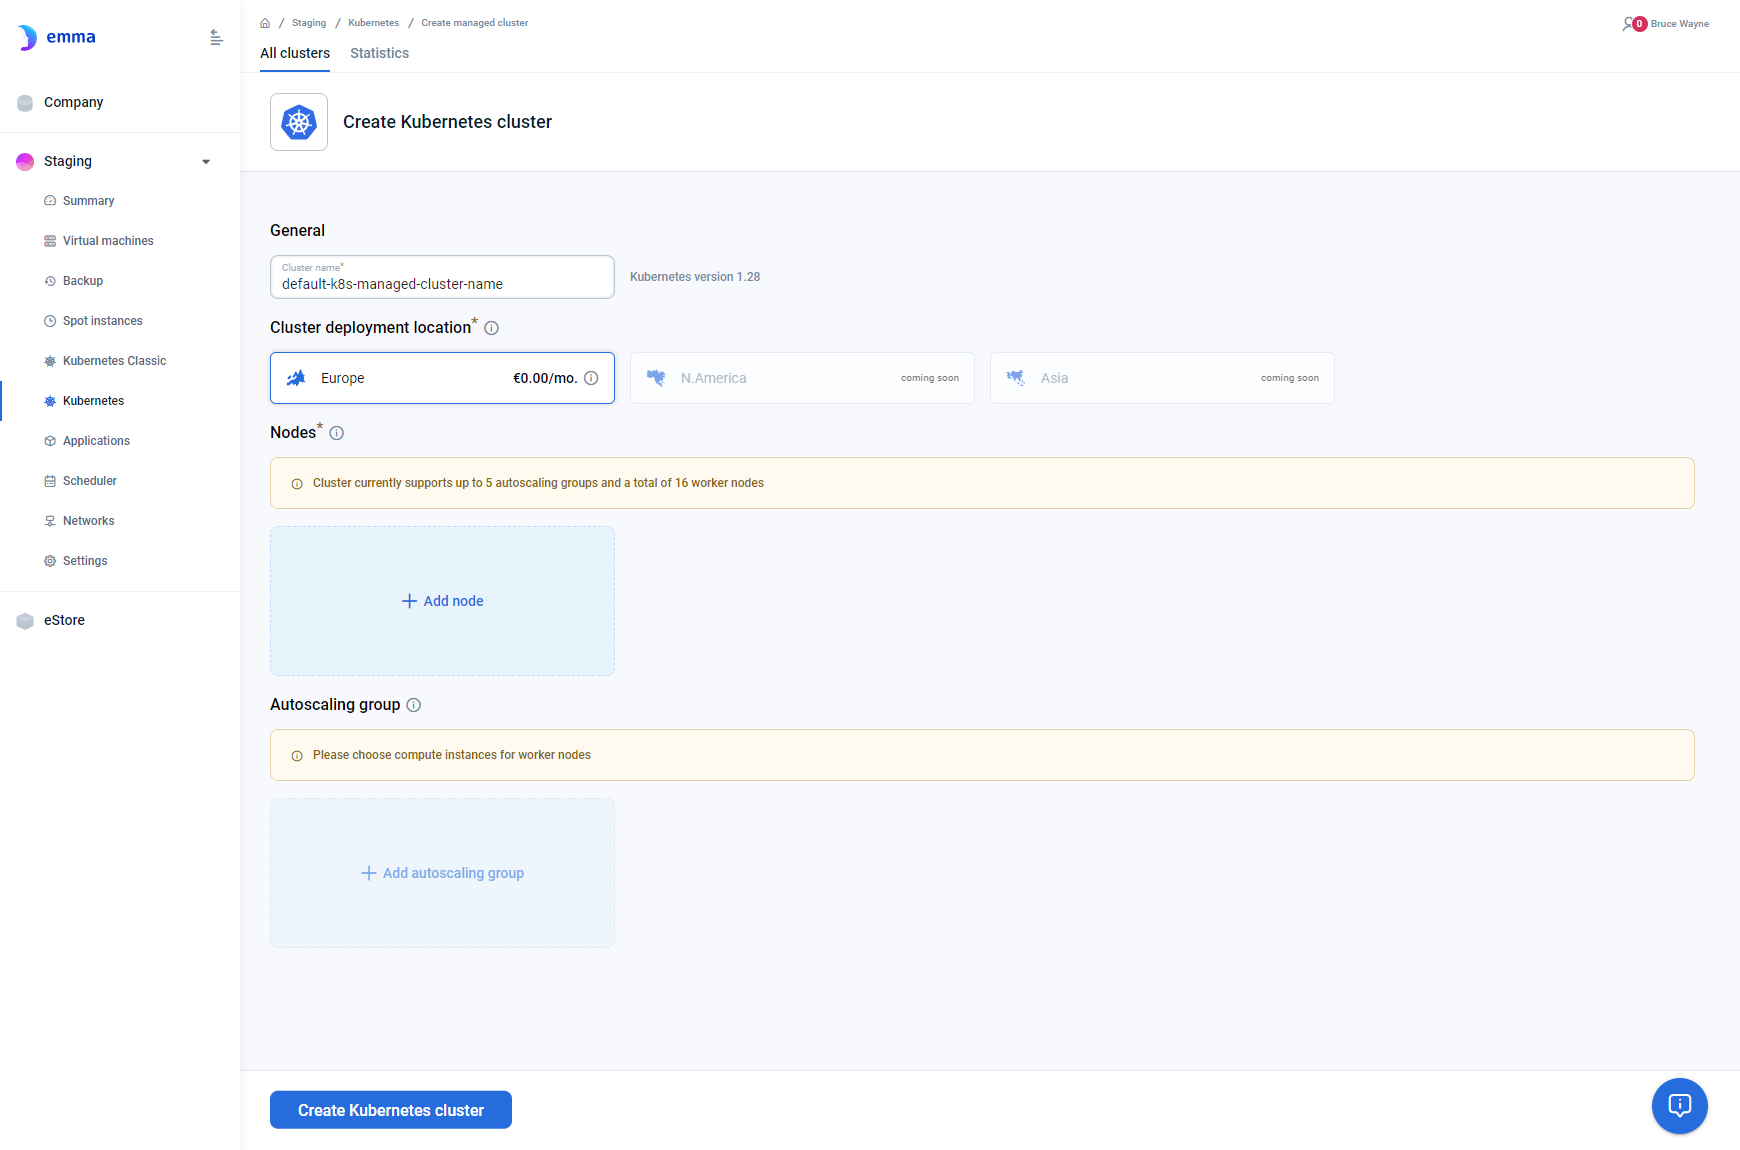
Enter the cluster name.
Select the region for deployment (currently only Europe is available).
You can create a cluster with only worker nodes, at least one, or optionally with nodes in an autoscaling group.
Click + Add node for worker node parameter settings:
- Location
- Provider
- vCPU / RAM / Storage Configuration
The configurations according to the specified parameters will be displayed on the right list, sorted by price.
Select a suitable configuration from the options provided.
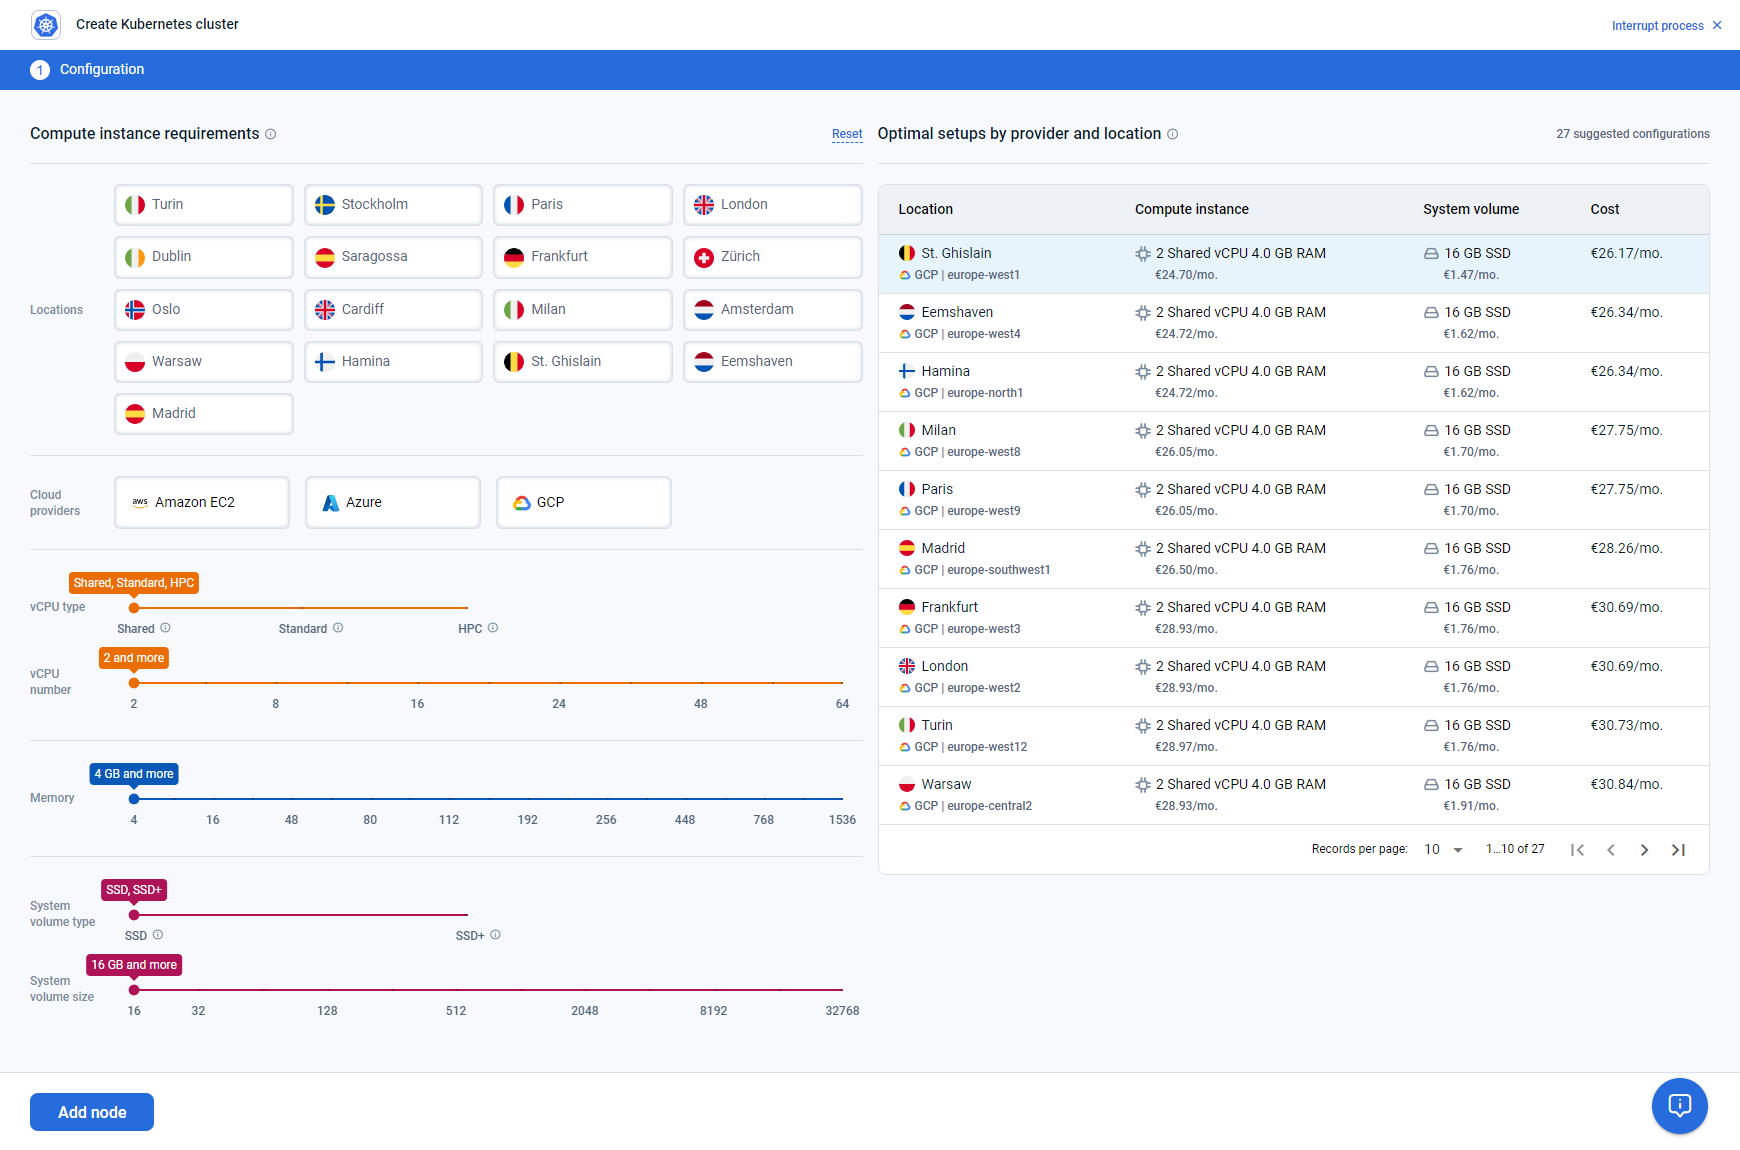
Click Add node at the bottom of the screen.
You can choose another node configuration, any available location, or provider.
Or create multiple identical nodes, with a total count of up to 16.
To create an autoscaling group, click + Add autoscaling group.
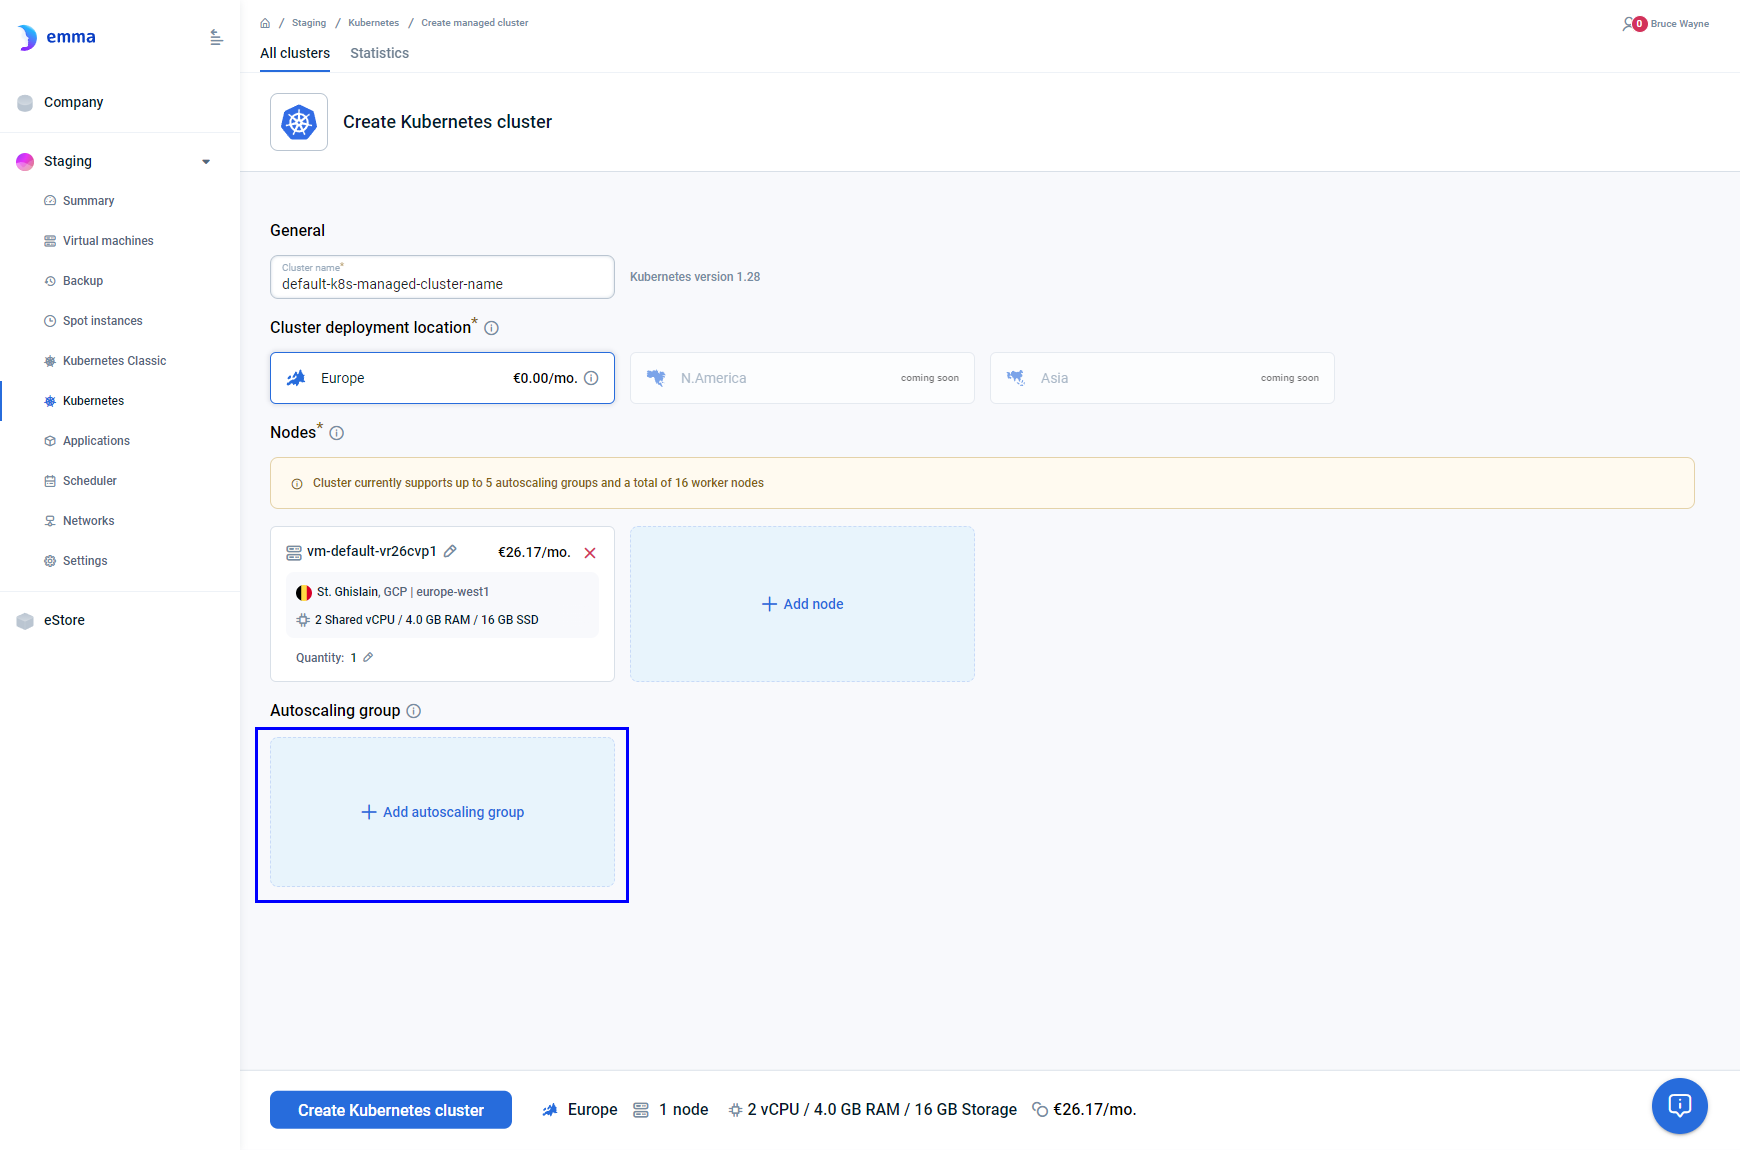
You can select the provider and location where the autoscaling group nodes will be placed.
Below, you will see a list of available configurations, sorted by price.
You can select any of them and add to the list of configurations that will be used when creating autoscaling group nodes. Configurations can have different priorities in the group - HIGH, MED, LOW.
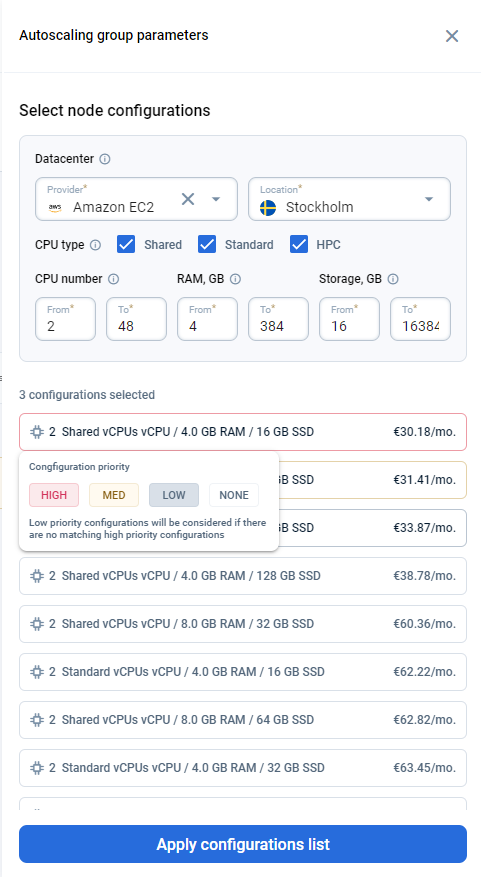
Priority configuration specifies the order in which configurations are chosen for node group creation. Thus, medium priority nodes will be considered for usage only when there are no suitable high priority configurations available. Low priority configurations will be considered only after medium ones.
After selecting the configurations, click Apply configuration list. You will be taken to the list of selected configurations and autoscaling group parameters. You can remove a configuration from the list by clicking NONE.
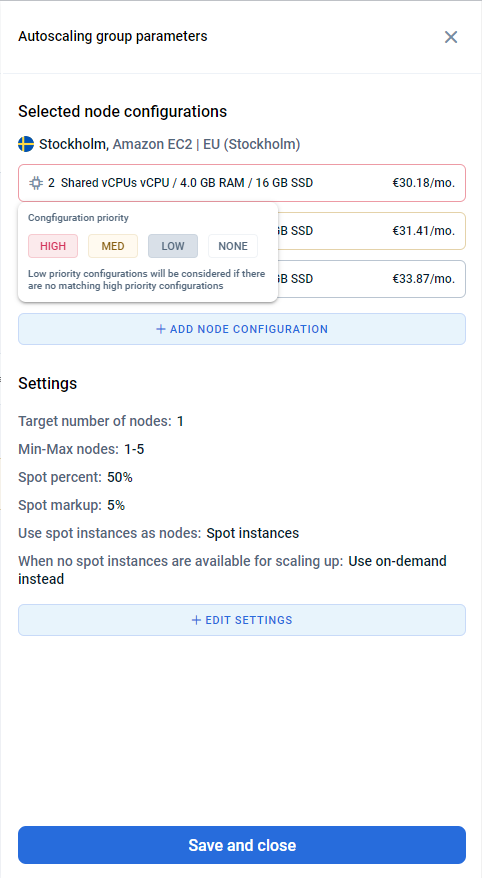
Click + EDIT SETTINGS to go to autoscaling group settings.
- Define group capacity by - you can choose the type of resource limits in the group, by the number of nodes or by vCPU.
- Min-Max - values defining the group sizes. Please note that the group requires at least one node.
- Node group price limit - optional limit on the maximum cost of nodes in the group.
- Minimal count of on-demand nodes (or Minimal count of on-demand vCPUs when scaling by vCPU) - the guaranteed on-demand capacity — nodes or vCPUs, matching the capacity mode — always running in the group, regardless of spot availability. On-demand instances are used to meet this floor first; remaining capacity is filled with spot instances according to the configured percentage. Setting this to
0or leaving the field empty creates a spot-only group (see below). - Use spot instances as nodes - percentage of Spot instances that will be used as group nodes if Spot instances are available at the time of scale up. The on-demand floor is set separately by the Minimal count of on-demand nodes field.
- Add extra markup to the spot's price - percentage increase in the price that will be set when creating a Spot. That markup is used to decrease the chance of the spot instances being preempted and continue the duration of the Spot.
- Only on-demand instances - only On-demand instances will be used, without creating Spots.
- When no spot instances are available for scaling up - you can define the group's behavior during a Scale up event if Spots are not available for creation. In this case, On-demand instances may be used, or Scale up may not be carried out.
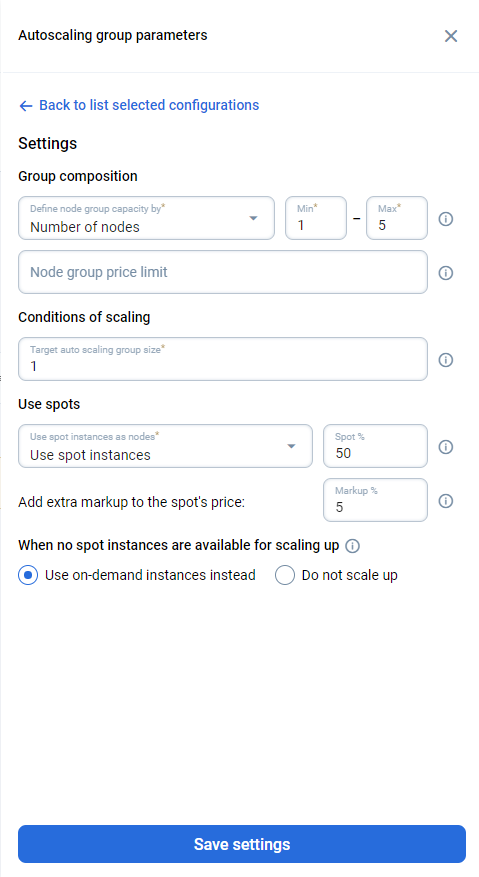
Click Save settings after configuring the parameters, then Save and close to exit the autoscaling group settings menu.
You can modify the autoscaling group name, parameters, add another group with different parameters, depending on your application requirements. Cluster currently supports up to 5 autoscaling groups and a total of 16 worker nodes.
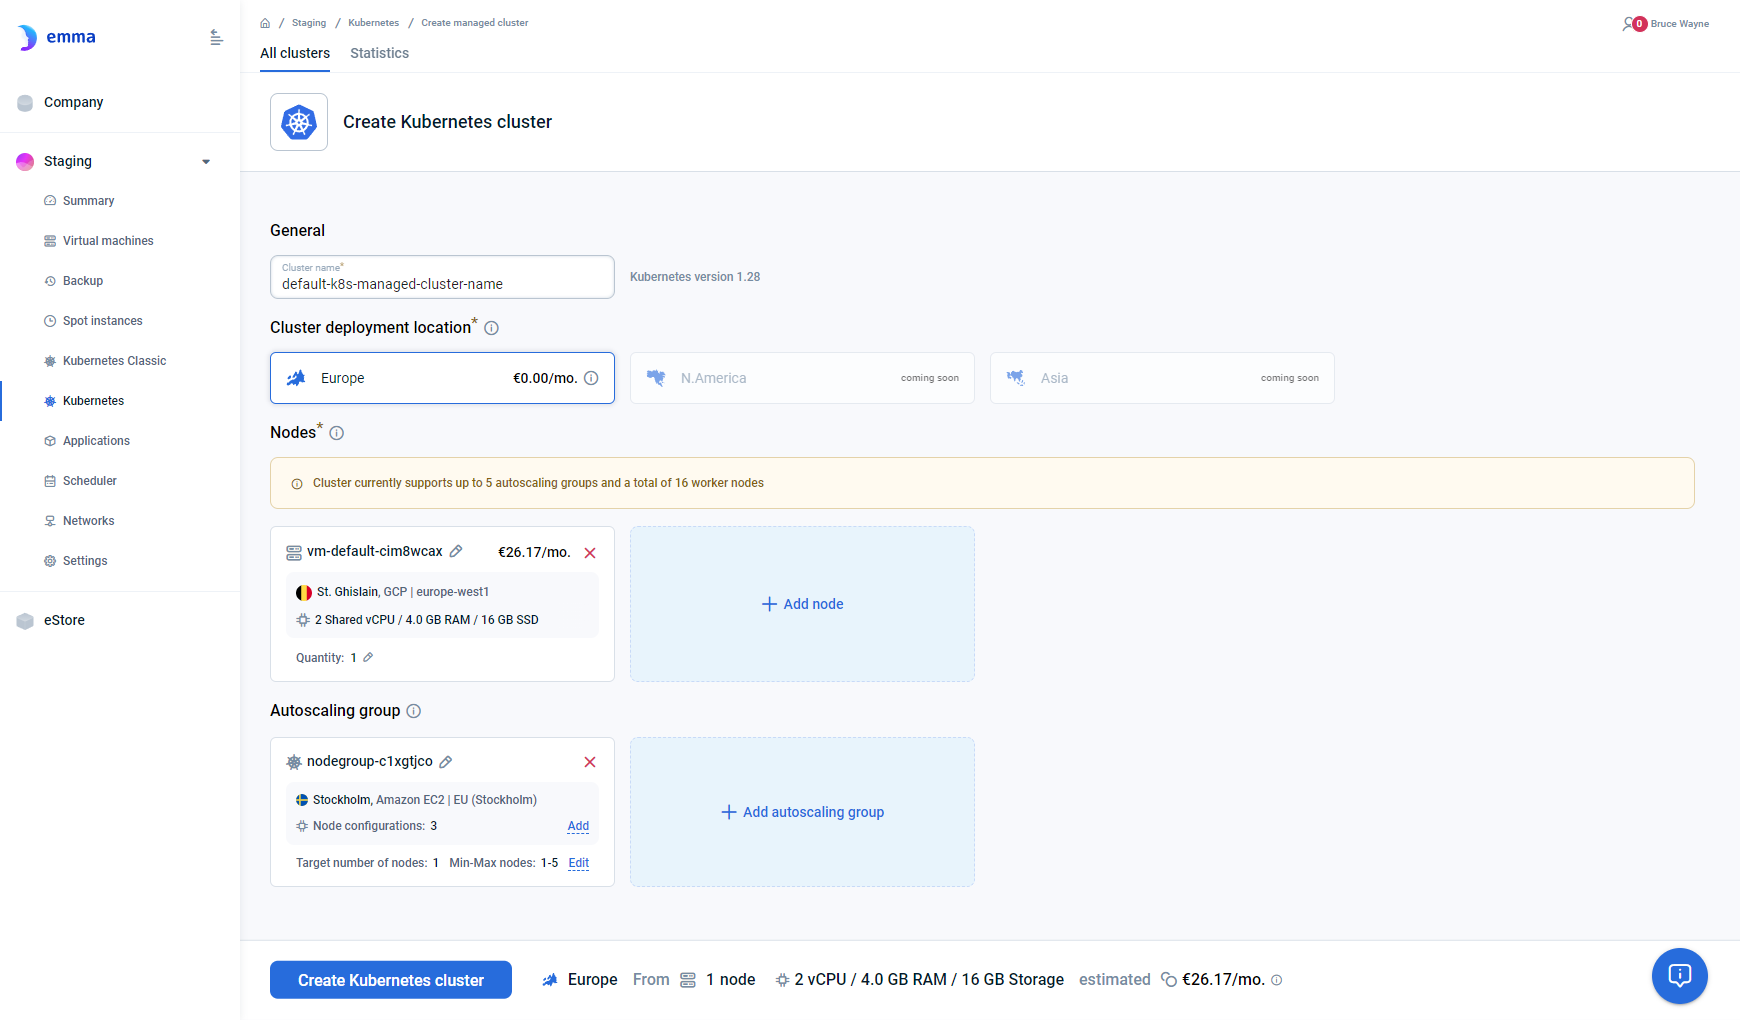
Click Create Kubernetes cluster to complete the cluster creation process, and you will be returned to the Kubernetes section.
Spot-only autoscaling group
Setting Minimal count of on-demand nodes to 0 or leaving the field empty removes the guaranteed on-demand capacity: the group can be filled entirely with spot instances. This minimizes cost, with two consequences:
- The group may be fully interrupted if no spot capacity is available.
- There is no on-demand floor, so during spot reclamation the running node count can fall below the group's Min.
This does not by itself disable on-demand fallback. When no spot instances are available for scaling up governs scale-up separately, and its default is Use on-demand instead — so a group with no on-demand floor can still receive on-demand nodes. For a group that never uses on-demand, set that option to Do not scale up as well.
Recommended only for fault-tolerant, stateless workloads that can tolerate interruptions.
Last updated on 1 Sept 2026