
Workflows
Overview
This page shows a list of all reusable infrastructure templates (workflows) available in your organization for single-instance deployments. The page displays both Default workflows (pre-built by emma) and Custom workflows (created by users).
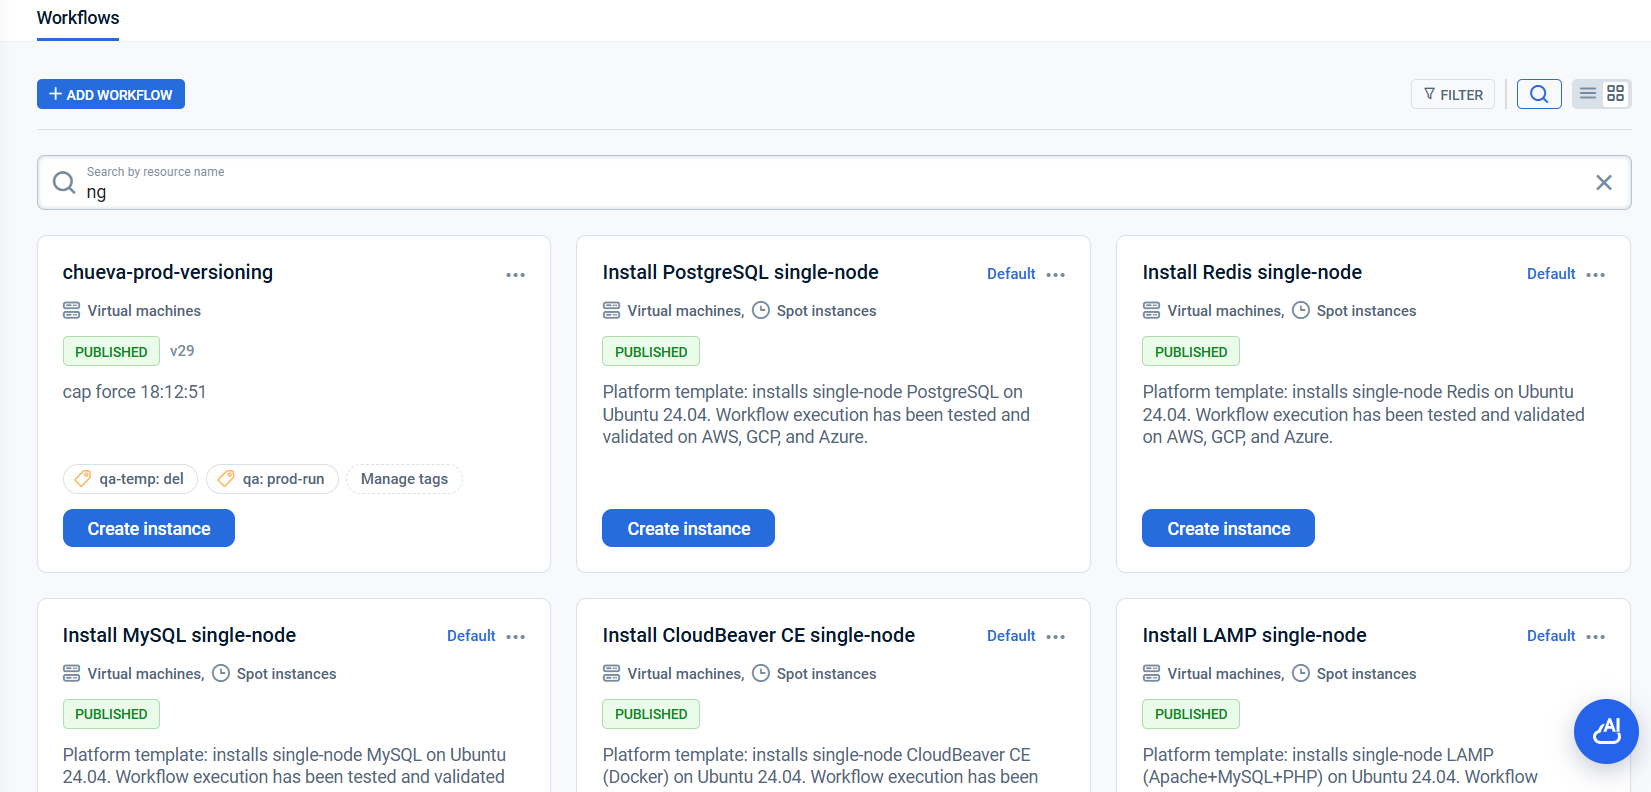
Information on this page
- List of all company workflows with name, description preview, status badge, and resource types
- Active version indicator on each workflow card / row — the badge shows the active version's name (for example,
v3orMySQL-8.0.35). For default workflows (managed by emma and not editable), the badge shows—because they don't have version history. All actions on the page — Publish, Deploy, Edit — operate on the active version.
Default and Custom workflows
There are two types of workflows:
Default workflows are pre-built templates provided and maintained by emma. They offer ready-to-use installation scripts for popular single-node applications such as LAMP stack, MySQL, etc.
Default workflows are identified by a "Default" badge displayed in both Grid and Table views. You can create instance using Default workflow or duplicate it to customize parameters or script.
Custom workflows are created by users within the organization. They are fully editable and can be tailored to any automation need.
Actions you can perform on this page
- Create new workflow ("+ Add Workflow" button)
- Edit existing workflow (Custom workflows only)
- Delete workflow (Custom workflows only)
- Duplicate workflow (Default and custom workflows)
- Manage versions — open the workflow for editing and click Version history in the header of the Edit Workflow page. The button carries the number of stored versions and opens the version list, where you can restore an earlier version, rename a version, or delete a non-active version. See Workflow versions for the full flow.
- Publish or Unpublish workflow (Default and custom workflows)
- Deploy workflow to a project
- Filter workflows by status and tags
- Search workflows by name
Actions available with the buttons
- +Add workflow Opens the Create Workflow page to create a new workflow template (requires Manage Infrastructure rights)
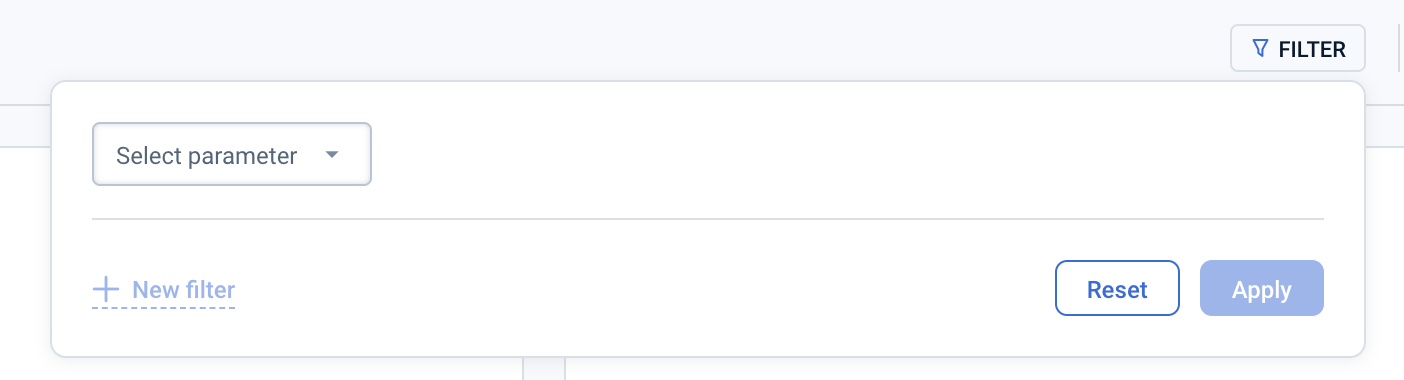
- Filter opens filter options to narrow down the list by workflow status (PUBLISHED/UNPUBLISHED) and by tags
- Search opens a text input to find a specific workflow by typing its name

- Grid / Table toggle Switches between Grid view (cards) and Table view (sortable table). The selected mode is persisted in local storage
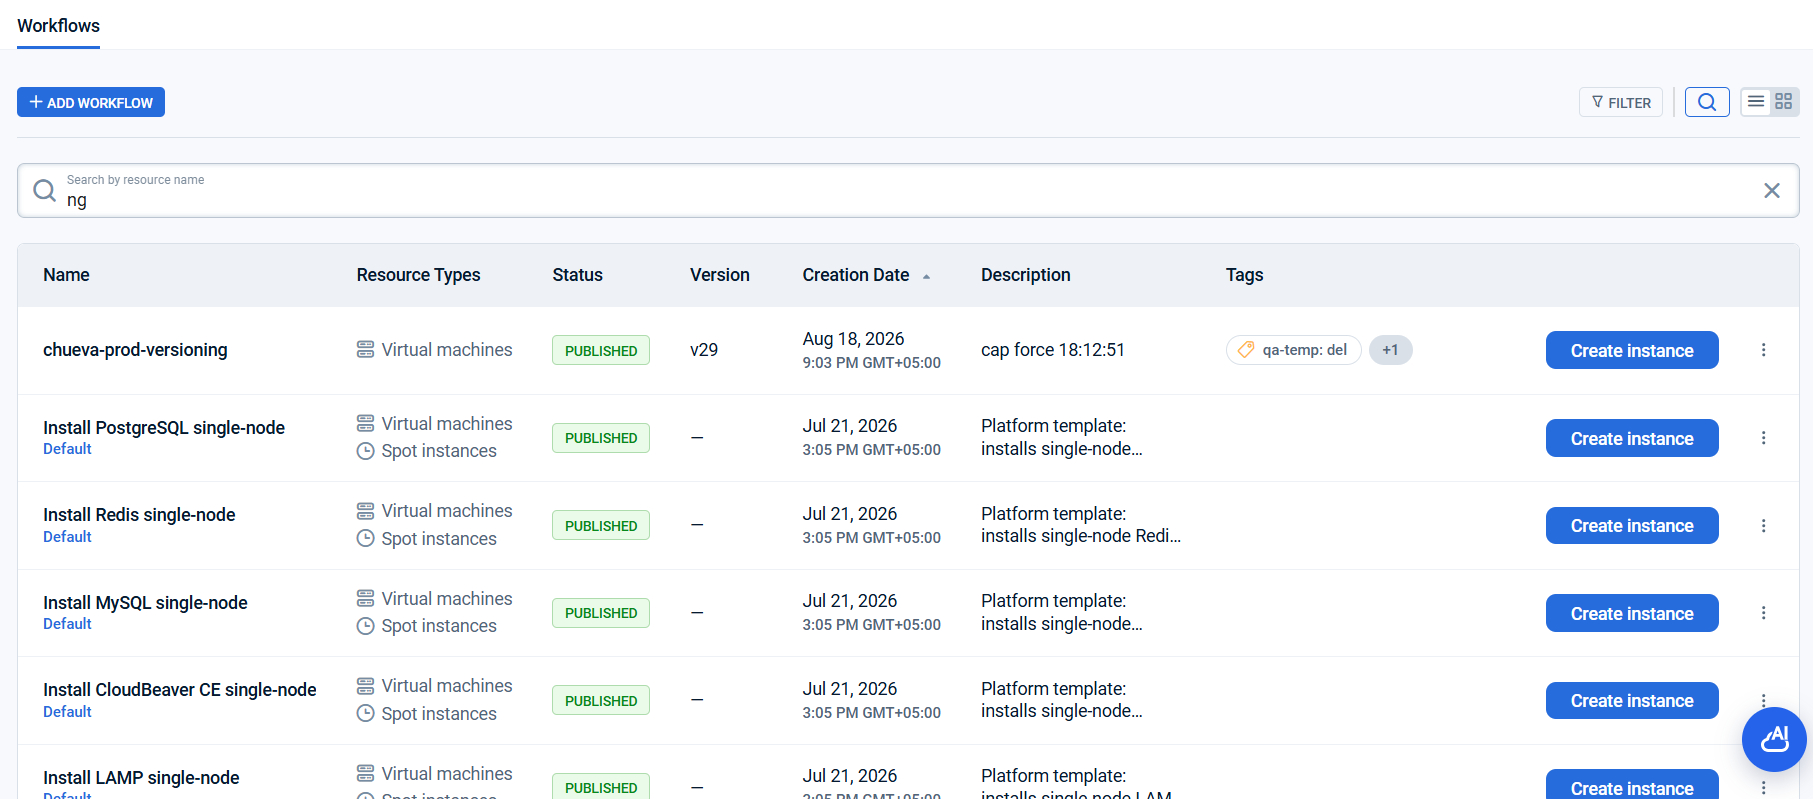
Action buttons on workflow cards / rows
- To open workflow detail page - click on the workflow card
- Publish appears when the workflow has valid scripts and status is Unpublished; publishes the workflow to make it available for deployment
- Fix the script appears when there are script validation errors; opens the script editor to fix the issues
- Create Instance appears when the workflow status is Published; opens the deployment wizard to provision a new instance from the workflow
Actions available with the menu
The menu actions differ depending on whether the workflow is Default or Custom.
- Default workflow:
- Publish/Unpublish,
- Duplicate
- Custom workflow:
- Edit,
- Publish/Unpublish,
- Delete,
- Duplicate
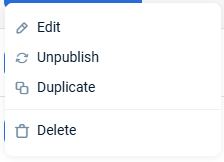
- Edit opens the Edit workflow page, where you can change workflow settings, scripts or parameters
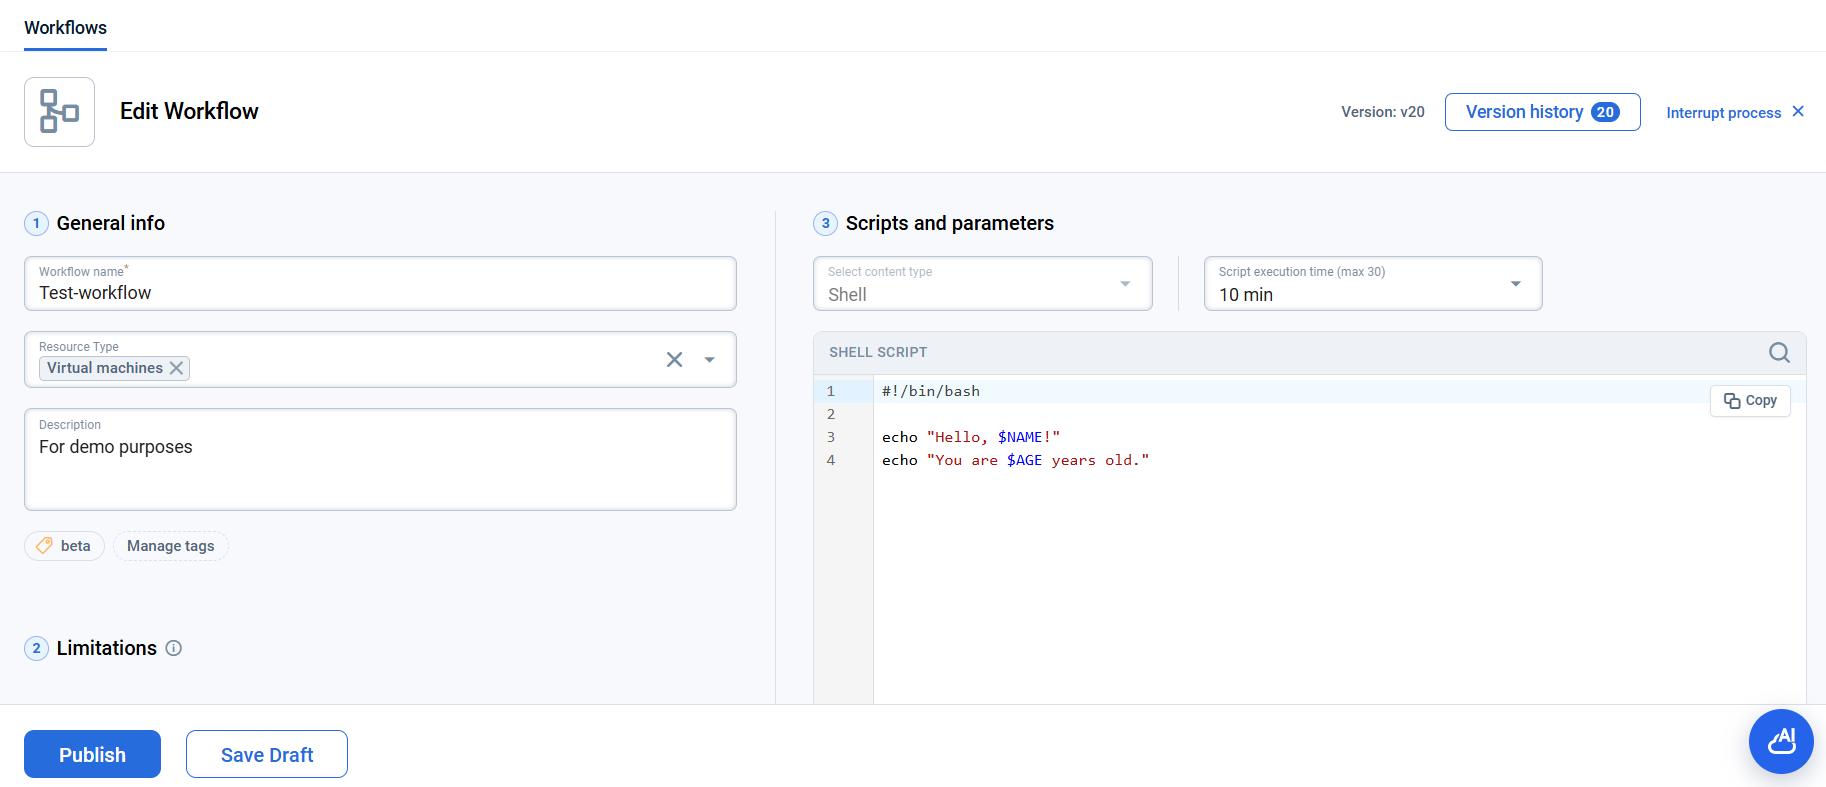
- Duplicate creates an independent, editable copy of the workflow. When you click Duplicate, the Workflow Editor opens with all fields pre-filled from the original workflow, except secret parameter values - these are cleared for security reasons and must be re-entered. Only the active version's snapshot is copied — the new workflow starts with a single version derived from the source workflow's active version. Version history is not copied. The duplicated workflow is always created as a Custom workflow, regardless of whether the original was a Default workflow.
Create Workflow page
This page shows a form to create a new workflow template with instance configuration, scripts, and parameters.
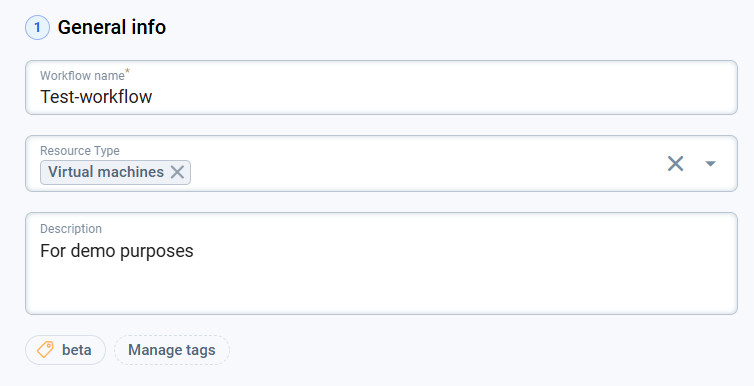
- Name field (required) — Enter the workflow name
- Resource Types (required) — Select one or more target resource types. This is a multi-select field. By default, Virtual machines and Spot instances are pre-selected.
- Description field (optional) — Add detailed instructions for end users
- Tags (optional) — Assign tags to the workflow to make it easier to find later. Tags show up on the workflow card and in the Tags column of the Table view, and the Workflows list can be filtered by them. Click Manage tags to add or remove them.
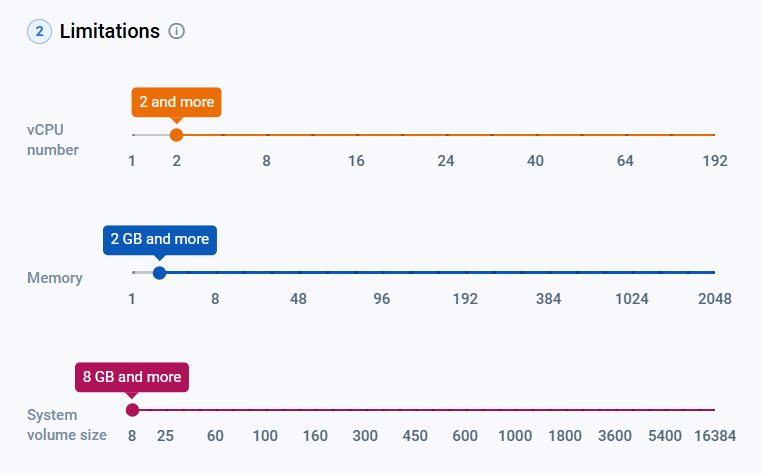
- Instance Limits section — Define min configuration for CPUs, RAM, Storage
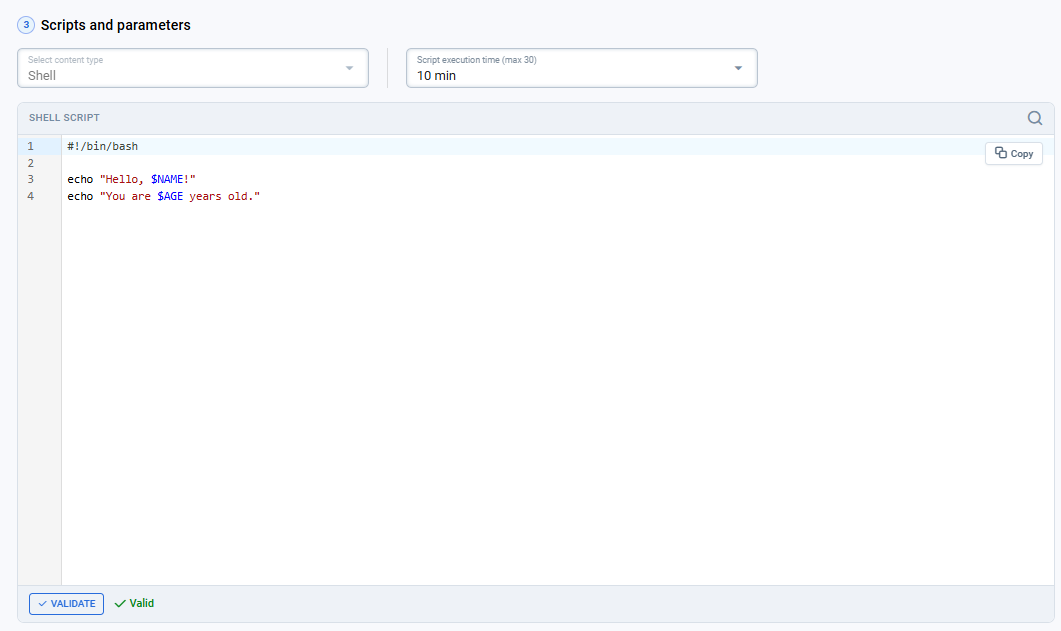
- Content Type — Shows "Shell" as the script type (currently only Shell is supported)
- Script execution time — Sets the maximum duration allowed for a script to run. If execution exceeds this limit, the script fails with a timeout error. Default: 10 minutes. Maximum: 30 minutes.
- Script field — Text area to enter shell commands to run after instance provisioning
- Validate button — Checks script syntax and displays errors or warnings
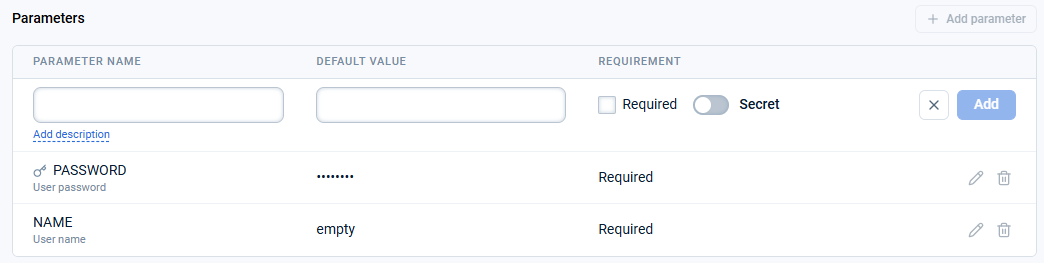
- Parameters section — + Add parameter opens an editable row inside the table. Fill the fields, then confirm the row with Add or discard it with ×. Saved parameters are changed with the pencil icon and removed with the trash icon.
- Parameter Name — Text field for the variable name used in the script
- Add description — Link under the name field. Adds an optional description, shown as a second line under the parameter name in the table, so whoever deploys the workflow knows what the value is for
- Default Value — Text field for the value used if the user doesn't provide one during deployment. A parameter saved without a default shows
emptyin this column - Requirement — Two independent controls in one column:
- Required — Checkbox. Marks that the user must provide a value during deployment
- Secret — Toggle. Marks the parameter as a secret
- Secret parameters behave differently once saved:
- The parameter value is securely stored and never displayed in the UI after it is saved
- In the table a secret parameter is marked with a key icon next to its name, and its default value is always shown masked
- On the workflow detail or edit page, the secret value is shown as masked. You can replace it with a new value, but you cannot view the current value
- When duplicating a workflow, secret parameter names are preserved, but their values are not copied
- Secret parameters are ideal for sensitive data such as passwords, API keys, tokens, and database credentials
- Save as Draft — Button to save the workflow with Unpublished status; active when all required fields are filled; the workflow can be edited later but cannot be deployed
- Publish — Button to save and publish the workflow; active when all required fields are filled AND the script has been validated with no errors; makes the workflow available for deployment

Versioning behavior on save
When you click Save as Draft or Publish on an existing workflow and the content is different from the current active version, emma stores an immutable version snapshot of the workflow. The newly saved version becomes the workflow's active version; earlier versions remain accessible via the workflow Edit page. See Workflow versions.
A workflow can hold up to 20 versions. Once the limit is reached, saving or restoring asks you to confirm deleting the oldest non-active version. Confirm it to proceed; decline and the action is cancelled — delete the versions you no longer need yourself, then repeat the action.
Deleting a version is irreversible.
OpenClaw installation
OpenClaw is an open-source personal AI assistant that runs on your own devices. It connects to messaging channels (Telegram, WhatsApp, Slack, Discord, and more) through a WebSocket-based gateway. The assistant uses Claude Sonnet as the AI brain via the Anthropic API.
What You Get Out of the Box
- Claude Sonnet 4 as the AI brain (via Anthropic API)
- Telegram channel configured and ready
- Conversation memory and knowledge management
- Multi-channel support (add WhatsApp, Slack, Discord later)
- Auto-language detection (responds in whatever language you write)
- Extensible with skills and tools
Cost Estimate
| Component | Cost | Notes |
| VM (2 vCPU, 4GB) | ~€26/month | GCORE Amsterdam pricing |
| Claude Sonnet API | ~$0.03/message | At ~20 messages/day = ~$18/month |
| Total | ~$45/month | For moderate daily use |
Deployment Steps
Step 1: Create Telegram Bot
Create a new bot via @BotFather in Telegram.
- Open Telegram, search for @BotFather
- Send /newbot
- Choose a display name (e.g. OpenClaw Assistant)
- Choose a username ending in _bot (e.g. my_openclaw_bot)
- Copy the token that looks like: 1234567890:AAH...
⚠️ Keep your bot token secret. Anyone with this token can control your bot.
Step 2: Get Your Chat ID
The bot needs your chat ID to know who to talk to.
- Open your new bot in Telegram and send it /start
- Open this URL in your browser (replace TOKEN with your bot token):
https://api.telegram.org/bot<TOKEN>/getUpdates
- Find your chat ID in the JSON response: "chat":{"id":123456789,...}
- Copy the numeric ID (e.g. 123456789)
Step 3: Get Anthropic API Key
Sign up at console.anthropic.com and create an API key.
Go to console.anthropic.com
- Navigate to API Keys section
- Click Create Key, copy the key starting with sk-ant-...
- Add credits to your account ($5 minimum recommended)
Deploy an Instance
- Go to Workflows, find OpenClaw AI Assistant, click Create Instance
- Choose a VM (vCPU 2+, Memory 4GB+, Storage 16GB+)
- Fill in OPENCLAW_TG_TOKEN, OPENCLAW_ANTHROPIC_KEY, OPENCLAW_CHAT_ID
- Click Create workflow instance and wait 3–5 minutes
- Check Telegram — your bot should greet you!
Start Chatting
Your bot is live. Just type any question in Telegram.
Try: ask anything in natural language, send /status for bot stats, or /help for available commands.
Deployment Script Reference
The script installs OpenClaw from npm, configures Telegram and Anthropic, and starts the service. Here is what it does step by step.
Execution Steps
The script runs as root on a fresh Ubuntu VM and executes 6 steps in sequence. If any step fails, the script aborts (set -euo pipefail).
| Step | Name | What It Does |
| 1 | System deps + Node.js | Installs curl, ca-certificates, gnupg; adds NodeSource repo; installs Node.js 22 |
| 2 | Create user | Creates system user openclaw with home /opt/openclaw; sets chmod 700 for security |
| 3 | Install OpenClaw | Runs npm install -g openclaw@latest — installs the official OpenClaw package from npm |
| 4 | Configure | Creates ~/.openclaw/openclaw.json with Telegram bot token, Anthropic API key, chat ID, bot name, and model |
| 5 | Install daemon | Runs openclaw onboard --install-daemon; falls back to manual systemd service if onboard fails |
| 6 | Health check | Waits 5 seconds, verifies service is active; prints VM IP and connection details |
Running the Script Manually
If emma.ms deployment failed or you want to run the script on your own Ubuntu VM, copy the script into a text editor(VS Code, Sublime, Notepad++, etc.) and save it as a file with a .sh extension(e.g., openclaw-vanilla.sh)
export OPENCLAW_TG_TOKEN="your-telegram-token"
export OPENCLAW_ANTHROPIC_KEY="sk-ant-..."
export OPENCLAW_CHAT_ID="123456789"
export OPENCLAW_BOT_NAME="Kesha"
export OPENCLAW_USER_NAME="YourName"
chmod +x openclaw-vanilla.sh && sudo -E ./openclaw-vanilla.sh
The -E flag preserves environment variables when running with sudo.
After Deployment: SSH & Configuration
Once the VM is running, connect via SSH to customize your assistant.
Connecting via SSH
ssh -i <path to ssh key> <username>@<VM_IP>
Find your VM IP in the emma.ms dashboard under your instance details.
Key Files
| Path | Description |
/opt/openclaw/.openclaw/openclaw.json | OpenClaw configuration (tokens, model, channels) |
/usr/lib/node_modules/openclaw/ | OpenClaw installation directory (npm global) |
journalctl -u openclaw | Application logs (systemd journal) |
Useful Commands
| Command | What It Does |
journalctl -u openclaw -f | Follow bot logs in real-time |
sudo systemctl restart openclaw | Restart bot (after config changes) |
sudo systemctl status openclaw | Check if bot is running |
openclaw config edit | Edit configuration interactively |
openclaw --version | Check installed OpenClaw version |
npm update -g openclaw | Update OpenClaw to latest version |
Troubleshooting
Bot didn’t send a message
- Check that OPENCLAW_CHAT_ID is correct (numbers only)
- Make sure you sent /start to the bot before deploying
- SSH in and check logs: journalctl -u openclaw --no-pager -n 50
Bot says API key is invalid
- Verify the Anthropic key at console.anthropic.com → API Keys
- Check that you have credits on your Anthropic account
- Verify config: cat /opt/openclaw/.openclaw/openclaw.json
emma.ms shows Error in callback
This is a known emma.ms platform issue. The VM may still have been created successfully.
- Check the emma.ms dashboard for your VM and its IP address
- SSH in and check: openclaw --version (if installed, the script ran)
- If not installed, run the script manually via SSH
Security Notes
- OpenClaw runs as a dedicated system user (openclaw), not root
- Config file is chmod 600 — only the openclaw user can read it
- Rotate your Telegram bot token if it was ever exposed
- Rotate your Anthropic API key periodically at console.anthropic.com
Last updated on 20 Aug 2026